System type: Microsoft Windows 7 professional, 32-bit Operating system / XUBUNTU 13.10
Motherboard: Gigabyte X58A-UD3R
Processor: Intel Core i7 CPU 960 @ 3.20Ghz
Ram: 4,00GB (3,5GB usable)
Hard drive: 367GB
Video card: Nvidia GeForce GTX 560 Ti
Current resolution: 1680*1050, 59Hz
Cd/dvd/Blueray Drive: Asus BW-12B1LT
This publish includes fifteen (15) steps to Make your own website and build your database using sql. Follow the steps and you'll have learned how to make personal website and have database that has data in it in no time. In case there is any problems please leave a comment and I'll do my best to help you. Hope it helps.
Step one (1)
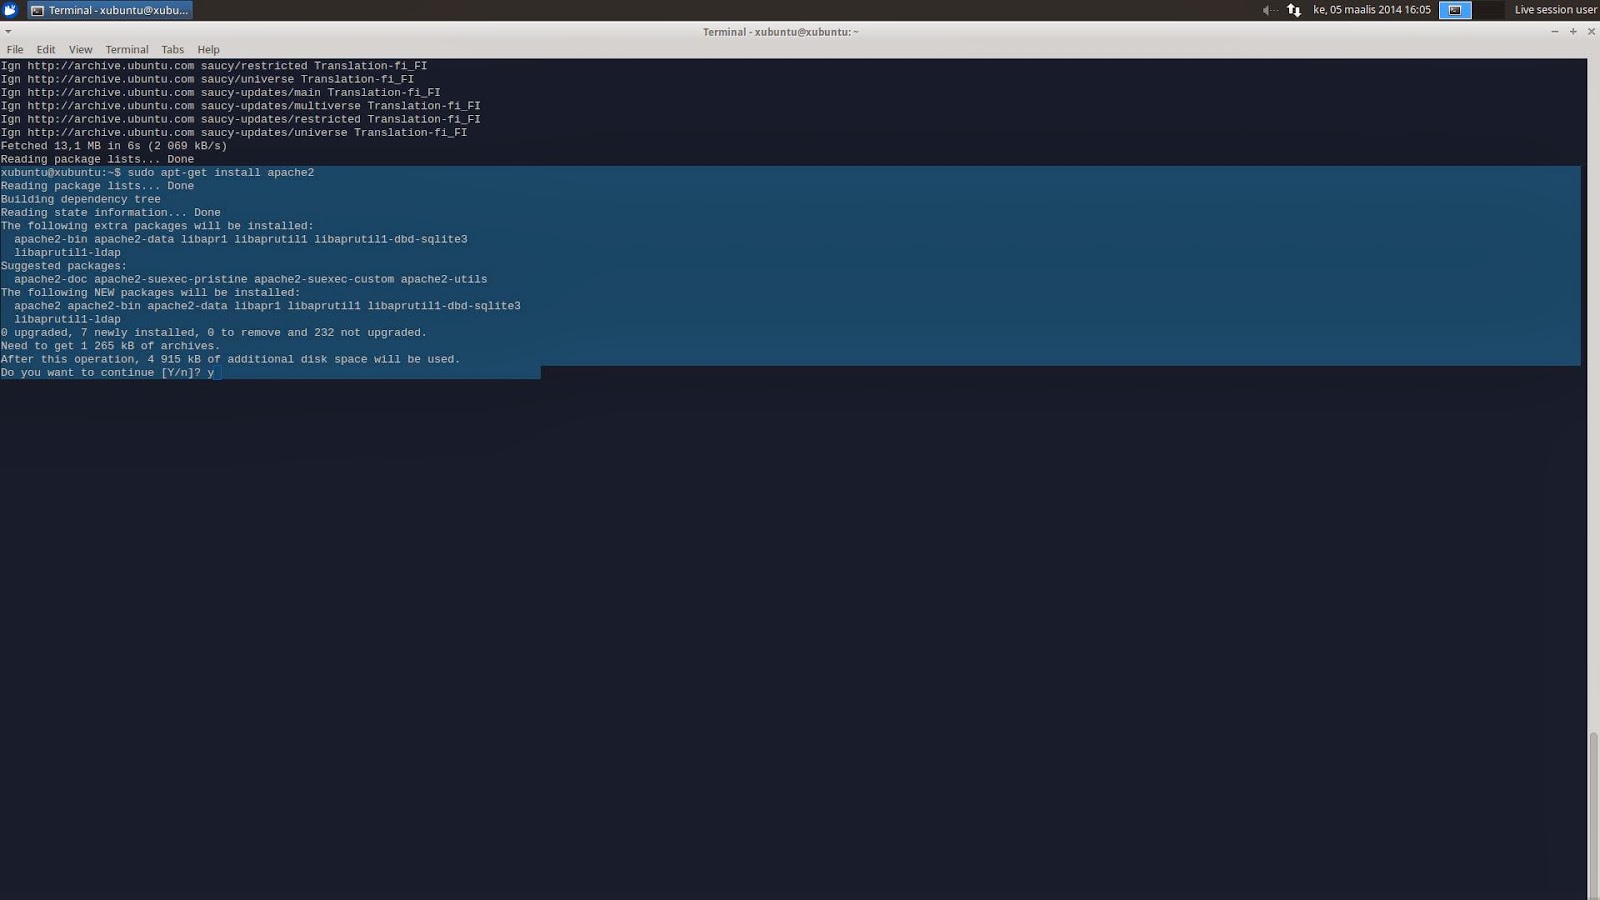
First step get the newest version of apps by typing sudo apt-get update. After updating you install apache2 with the command sudo apt-get install apache2. In middle of install it will pop up a question where you answer "Yes" by typing "y" after that press enter.
After that try if the server works. You can test that by going to your local host in your browser: " http://localhost" If it gives this message as in the picture it works perfectly!

Step three (3)
After that we make a directory "public_html" with "sudo mkdir public_html" in the Xubuntu folder!

Step four (4)
After that you first enter to the directory with "cd public_html" and make the index.html file. You do this by writing "sudo nano index.html".

Step five (5)
After you have created your index.html you can type anything inside it. In this case we use HTML5 so we used in this example this for example:
<!doctype html><html><head> <title>My Test Page</title> <meta
charset="utf-8" /> </head><body> <h1>
My Test Page </h1> <p>Päivää! Welcome!!!</p></body></html>
After this we save and close the file.

Step six (6)
After that we give everybody right to edit and read the index.html page. We do that by using the command "sudo chmod 666 index.html"

Step seven (7)
After that we need to give the right to Apache server to use your userdir to access the index.html that you just created in Apache module . You do that by executing the command "sudo a2enmod userdir".

Step eight (8)
It will give you the suggestion to restart your Apache server. You just follow the text and execute the command " sudo Service apache2 restart".

Step nine (9)
Now you can try to access your webpage in your browser. You do this with "ip/~username" for example "192.168.0.11/~xubuntu" if you don't know your ip you can check it with command "ip addr" your ip will be in the third line next to "inet" if you also have problem to know what is your user you can use command "whoami" and it will print your username. If everything worked correctly you should get this page in your browser:

Step ten (10)
Next we are installing database for our server. In this case we are using mysql-server. To get this you need to install "mysql-server" and "mysql-client" you can do this by first typing "Sudo apt-get install mysql-server" and after that "Sudo apt-get install mysql-client" after installing them you can start using the database program by typing "mysql -u root –p"

Step eleven (11)
After the program has opened you first create the database you use command " CREATE DATABASE" in our example we use Products so we type "CREATE DATABASE Products" remember yo use the capitals in "CREATE DATABASE"!

after that you start using it with command "USE" in this case because we made "Products" we type "USE Products". After that we build a table. in this case our table is only going to have personal ID number, name of the product and description what the product is. We can do that by typing " CREATE TABLE Product (id PRIMARY KEY, pName NVARCHAR(80), pDescription NVARCHAR(200));

Step thirteen (13)
To show the table you can simply write "SHOW TABLES"

Step fourteen (14)
Before adding data to your table you have to think what data you want to put in there and you have to also put it in the same order you built the database. As we gave in this case first value as integer it has to be numeral value, other values where NVARCHAR so we can use only text in these values remember, The number we wrote inside the NVCHAR brackets describes the amount of characters you can use. So in this case for example the product pName you can use only "80" characters. Also spaces are characters. Remember to have this " ' " sign always infront and behind the text you have written otherwise it'll be an error. Also remember to seperate different values with coma " , ". To insert data to the table you simply type" INSERT INTO PRODUCT VALUES(0001,'SuperBall,'Bouncing ball, that bounces a lot');"

Step fifteen (15)
To show whats in the table type: "SELECT * FROM Product" and you'll see you product and description in the table. Star sign "*" means it selects everything from the table.

Links:
http://terokarvinen.com/2014/agenda-for-linux-basics-dat8tf063-23-spring-2014
http://terokarvinen.com/2008/install-apache-web-server-on-ubuntu-4
http://terokarvinen.com/bilkent.html
http://terokarvinen.com/2012/short-html5-page
THANK YOU FOR READING!
HOPE IT HELPED
No comments:
Post a Comment